This website uses cookies to ensure you get the best experience on our website. Learn more. Only use essential cookies .
How To Set Up a Photography Studio
In this “how to set up a photography/videography studio” guide, we investigate the use of different lights, backgrounds, ceiling tracks and more. And we’ll explain any jargon we use.
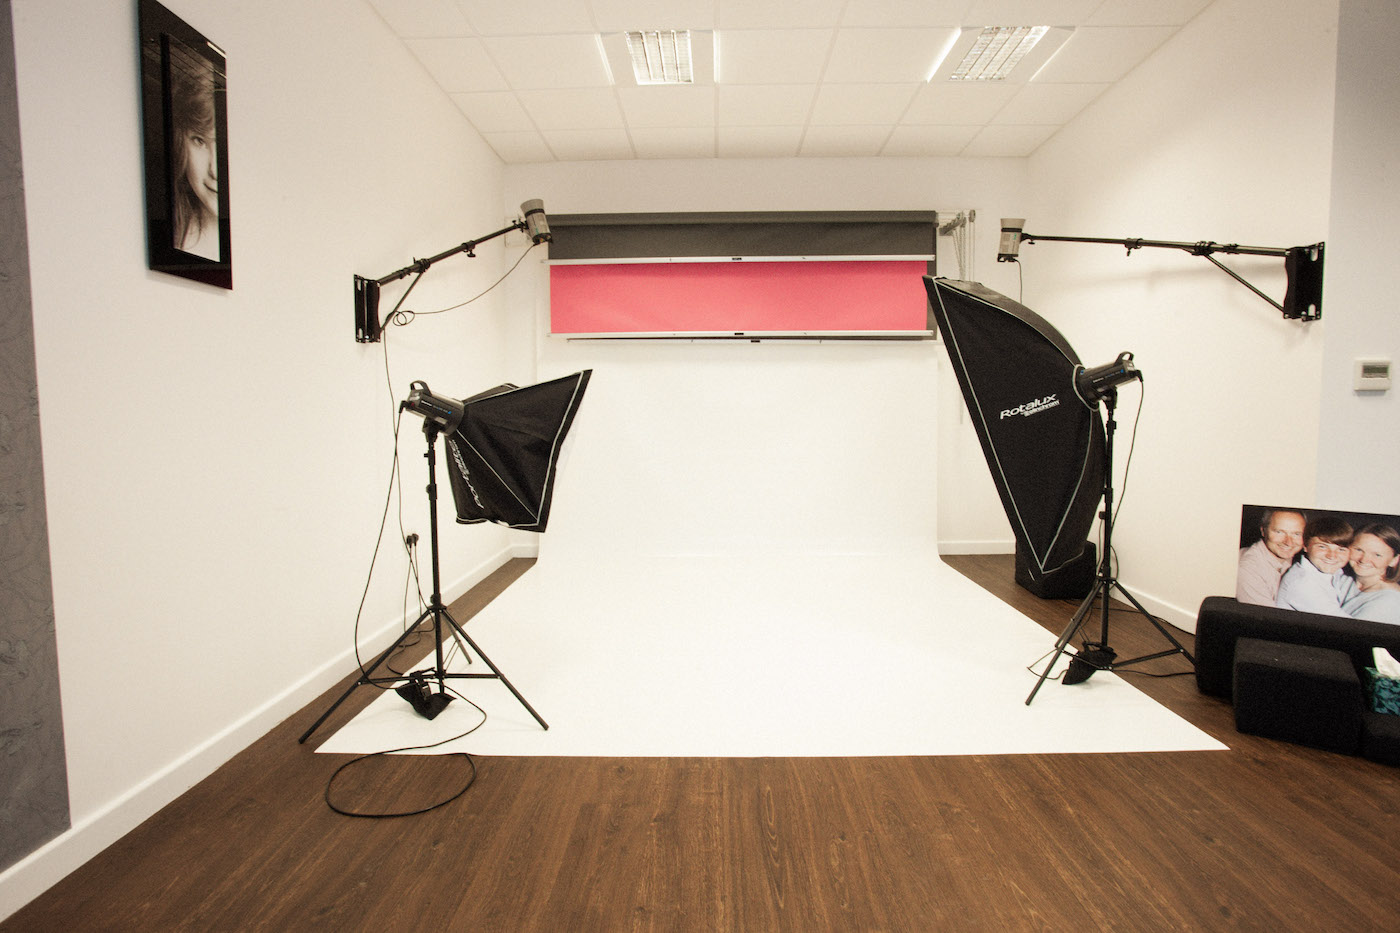
When we talk of a photographic studio, it's easy to imagine a large white room with a cove, various backdrops and lots of lighting, umbrellas and softboxes to avoid hard shadows and full-on beams of light.
Jargon Buster
What's a cove?
Also known as an infinity cove (or curve), it’s a plain, one-colour backdrop with just curves and has no angles (such as you’d see between the floor and wall). This cuts out shadows that might detract from the photography. Usually, coves are much larger than the subject or object being photographed.
Umbrellas?
Whether they are shoot-through (translucent for shining light through), or reflective, umbrellas act as lighting modifiers and affect the light that falls on your subject.
What are softboxes?
More lighting modifiers, these are boxes covered in material that diffuses light. The box is fitted over the lighting source and again affects the light that falls on your subject.
A simple studio can be set up in a spare room or garage but, assuming you’ve already decided on the location, where do you start?
Let's consider the type of photography you do, or plan to do. We’ll focus for now on …
Portrait Photography
Paper Backgrounds
You’ll need a background (or backdrop). The popular choice is paper and not just because it is the cheapest - it offers the huge advantage of being the easiest to light with a very even light dispersion. Paper rolls are available in a wide array of colours and sizes (in standardised widths and lengths). If your choice of studio room doesn’t work for the standard widths of rolls, then you can ask your supplier to cut them to a specific width for you.
Other Backgrounds
There are canvas, muslin and vinyl backdrops as well as pop-ups depending on your budget. Canvas adds a texture to your shoot. Muslin is durable yet lightweight and can be draped to add interest. Vinyl, also durable, is the easiest to clean (ideal for those messy cake smashes). Pop-ups are highly portable and fold away generally into a flat disc which you immediately place in a bag before they pop up again.
Background supports
As always, budget is a factor.
There are simple, three-piece portable support systems, consisting of a horizontal backdrop rod held up by two adjustable stands on either side. Each stand uses a tripod to keep it upright which means of course you need to treat it as a trip hazard.
For a more permanent solution, wall or ceiling mounted systems are generally the best choice. These can work well in the smaller studio as they don't take up much room and you don’t have to worry about any trip hazards on the floor. The more expensive versions, as you’d expect, include extra features for storing and selecting different backdrops to suit the shoot.
Lighting – How many?
One head (light source) on its own will always produce shadows on the opposite side of the subject. Unless that’s the effect you are after, two heads minimum should always be used to control and reduce or eliminate shadows.
Lighting - Types
Generally speaking, continuous lighting is used for product and still life shots, whereas flash lighting is generally used for people, animal and large area shoots.
Continuous Lighting
Daylight-balanced LEDs are the modern continuous lighting solution. They are colour balanced with daylight temperature (5600k) within their range which means there aren’t any issues with colour cast. In turn this means you can simply point and shoot.
Jargon Buster
What is daylight temperature?
The Kelvin Colour Temperature Scale is a way of describing the light from a light source. For example, 5600K bulbs relate to natural daylight around midday. 3200K relates to a warmer orange-yellow from tungsten bulbs that you’d expect indoors. 1000-2000K relates to candlelight.
Colour cast?
Usually an unwanted tint of one colour that affects the image. It tends to be caused by the lighting.
Daylight-balanced LEDs tend to run at lower temperatures which means they won’t get unbearably hot. They also offer lower running costs.
However, power levels are not as high as in traditional tungsten or halogen lamps, so they do not work so well in large areas.
If you're working with video, then continuous lighting is definitely for you. And if you're a photographer learning about light then this is well worth considering.
Flash lighting
Flash lighting is placed into several categories by functionality. But let's concentrate here on studio strobes and monoblocks as they are the standard studio lighting kits used in professional and home studios everywhere.
Manufacturers offer several model ranges within this group, for different budgets and functionality.
Jargon Buster
Studio Strobes
Like flash photography on cameras, studio strobes emit a burst of light that’s strong and bright. They recharge (or recycle) quickly and range in power from 100 watts up to huge kilowatt units.
Monoblocks
These are individual self-contained flash units that plug into the mains. They include the light source (or head), the mains-powered power source, cooling fan (if required) and options for attaching light modifiers.
Power pack
A power pack is a control centre for running multiple smaller lights.
Lighting starter kits
In general, a starter kit will typically include two monoblocks, two stands, a sync cable and/or a wireless trigger and light modifiers such as white umbrellas, silver umbrellas or softboxes.
Light modifiers are a fantastic tool when working with flash as they allow us to diffuse and control the spread of light for all kinds of looks.
Sync cable or wireless trigger?
Wireless triggers are a perfect add-on if they don't come with the lights, as flash sync cables are fiddly and a real trip hazard. What's more, many cameras don't have a sync cable socket.
Wireless triggers are cheap and make things easier.
Flash studio lighting has several advantages over continuous lighting:
- a huge range of accessories so you can be as creative as you need
- you can accurately control the light from each head
- you decide exactly what setting to shoot at
- able to light up large areas due to the much greater power range than continuous lighting
- not as harsh as continuous lighting - ideal for softer skin tone in portrait photography
How to support your lighting
You can go for something as simple as a lighting stand. Or, if the budget allows, you can buy a ceiling track system that will get everything off the floor, giving a clear working space.
How different is all the above from a commercial studio?
The studio setup we’ve covered so far will get you up and running.
Commercial/high-end setups can start with this and go all the way up to full-on everything (a technical term). This can mean coves, ceiling tracks for lighting, wall or ceiling mounted background supports for multiple background materials, all with the infrastructure permanently installed.
This in turn means kit lists, a site review, logistics planning, then the build itself, probably working with Health and Safety staff and a Facilities team to ensure all the electrics are in place. All this followed by a site clean-up and handover.
But if you’re just starting out and looking for a low-cost photography studio setup, stick with the five basics and go for the best that your budget can afford:
- Background(s)
- Background support
- Lighting
- Lighting support
- Light modifiers
What about the camera?
That’s a given of course as it’s not a shoot without the camera. But the choice of camera(s) (not to mention accessories such as laptops and image software, tripods, data storage, camera bags etc) is huge and not something we can cover here. Instead, we’ve focused on the studio itself, leaving you to bring your favourite camera into the picture.
Anything else?
Yes, a few quick mentions of:
- Storage – you’ll need somewhere tidy to put your ever-growing pile of studio kit
- Extra batteries for your camera equipment
- Extra fuses for any electrical gear
- Extension leads for your lighting and cable protectors to reduce trip hazards
- Sandbags are handy for stabilizing tripods (and minimizing risk to your lighting)
- Props for your models to sit on or lean against (or play with)
- A chair or two for your models and clients to sit on when it’s time for a cuppa
- Cleaning materials (we did mention that cake smash earlier)
One final point:
Please remember, if you are doing this commercially (rather than as a hobby), building your studio doesn’t build your business, it facilitates it. To build your business you’ll still need to go out and find clients.
Need assistance?
Here at LuxS we supply everything you need for your studio from a start up to a commercial setup. We also provide advice and design and install services as well as custom fabrications.
If you would like us to quote you for your requirements, please get in touch by phone or email or via our contact form.